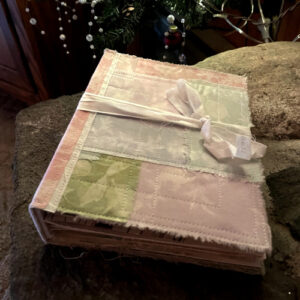
11.20.23 Junk Journals! Who knew???
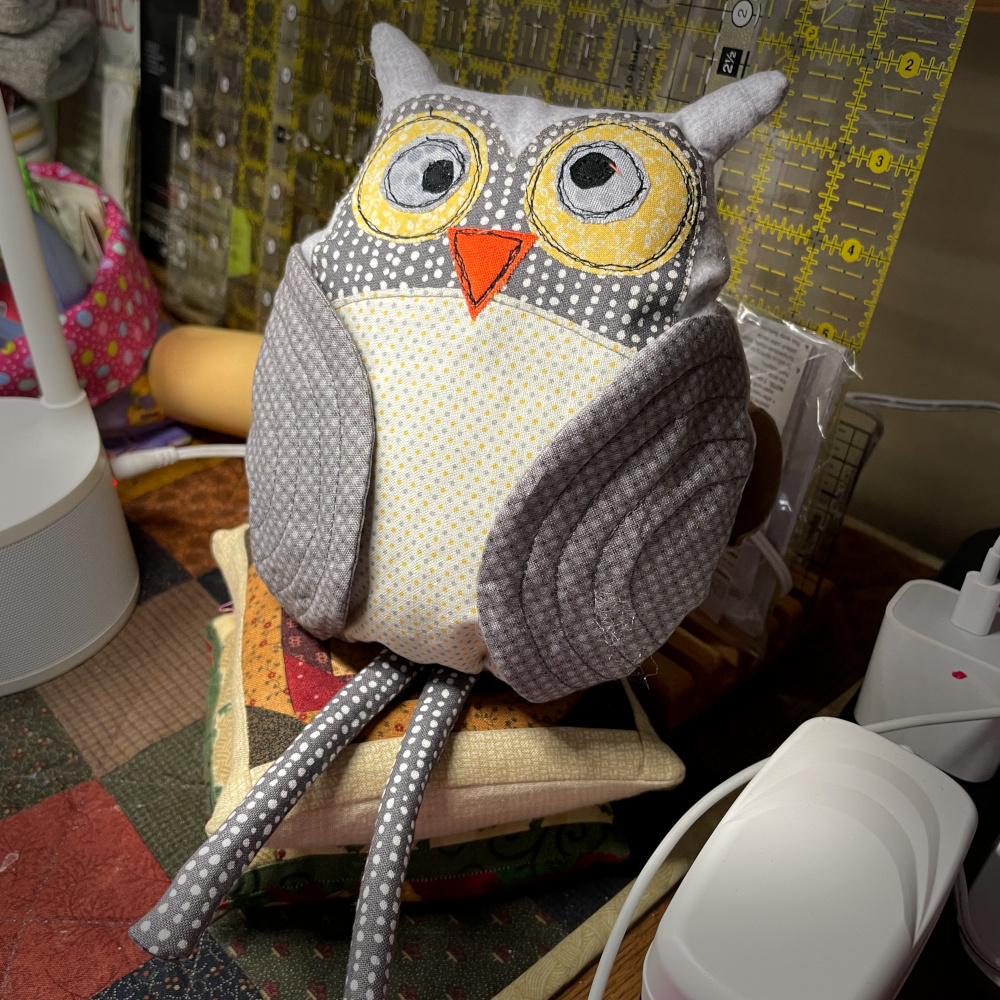
Juniper Owl was inspired by an owl my granddaughter spotted at an outdoor winter market last December as we explored the festively decorated and overflowing wooden stalls of the enchanted Duluth Winter Village set up on the shore of Lake Superior.
Despite the cold, Winter Village was packed. Maybe it was so busy because Covid prevented the 2020 Village and the new location motivated many to brave the cold. So with the long lines, children in tow interested in cotton candy, and the cold I was not able to purchase this owl on the down-low for a Christmas present. The owl she spotted, which was beautifully constructed, was priced at $40.
From memory I needed to create something similar to meet my granddaughter’s expectations. I also looked to Pinterest for inspiration.
When Hattie met Juniper Owl on Christmas Day she recognized it as the owl she saw at the Winter Village.
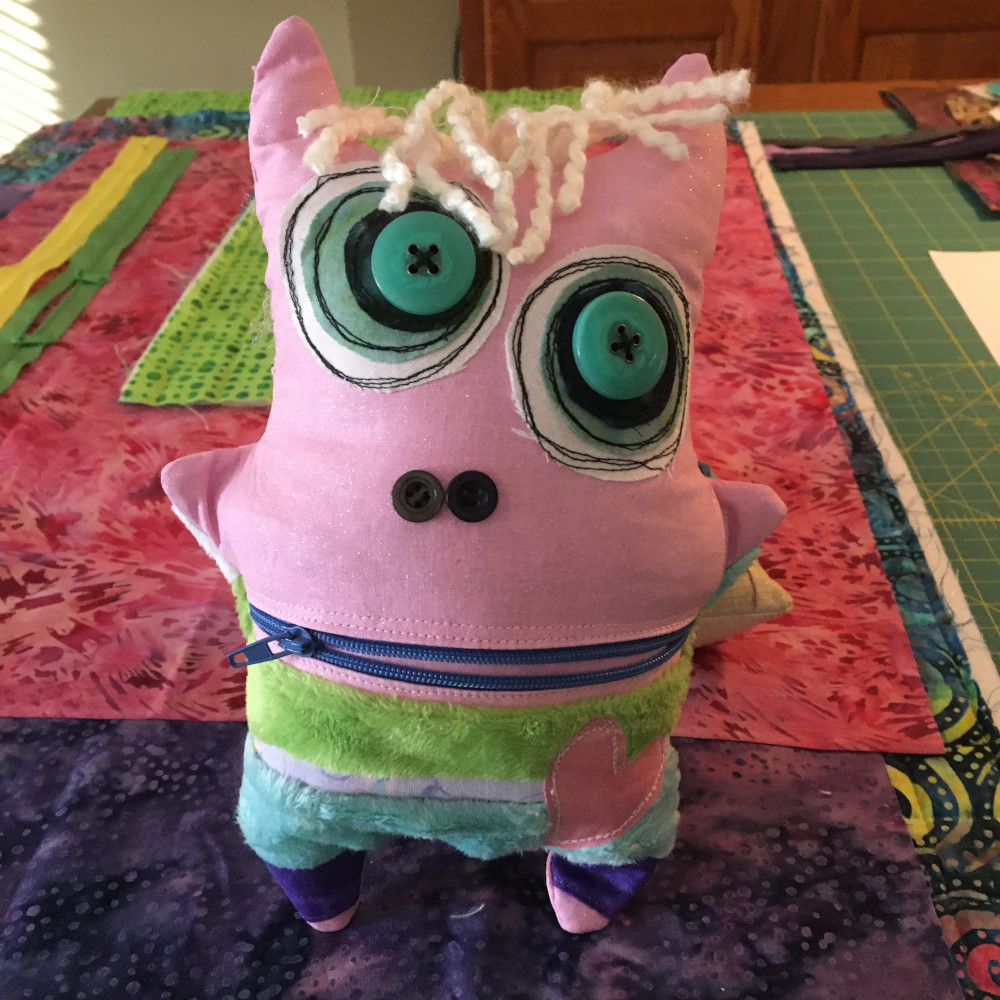
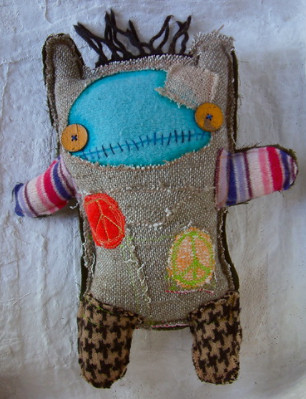
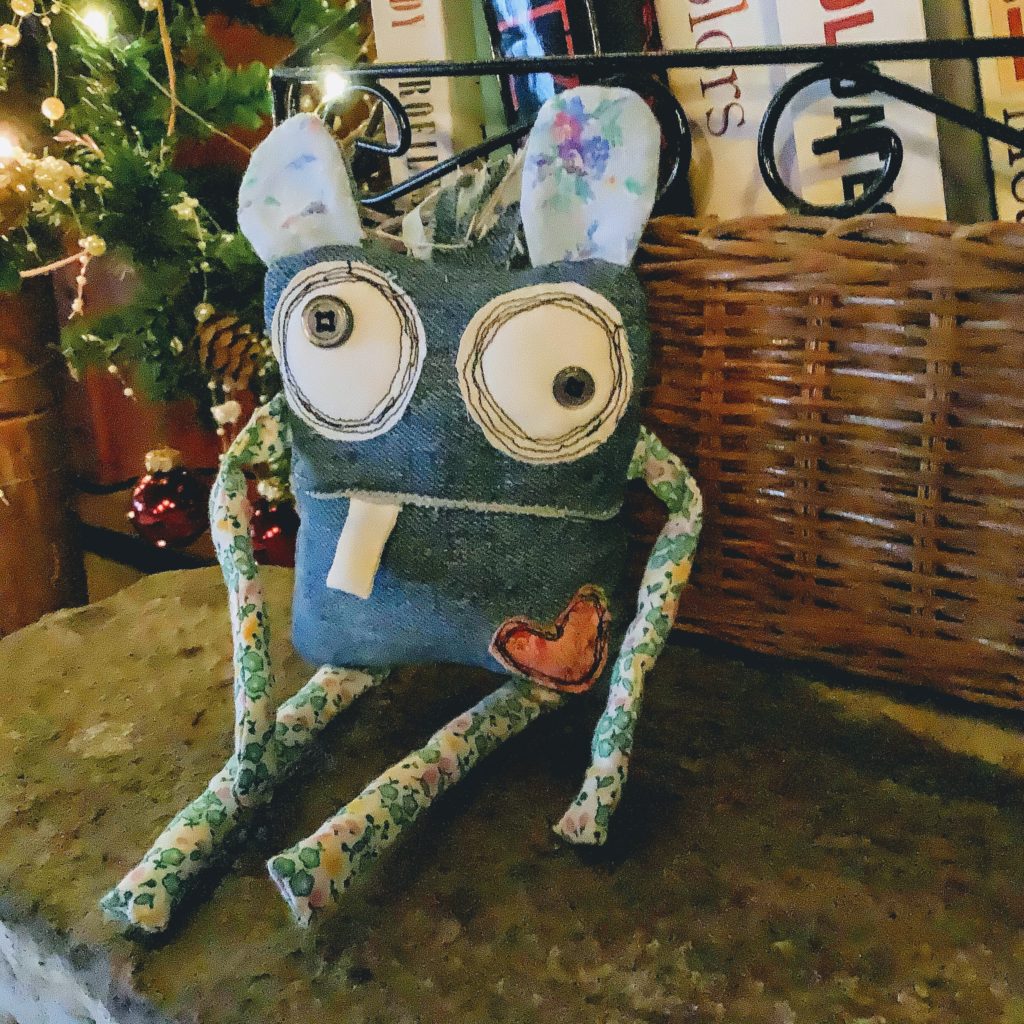
Non-conforming Plush Characters
Using inspiration from sites like Suse Bauer from Germany (my Worry Stuffie) and Karna Erickson (Peace Keeper) I created my first original stuffie, Crazy. It was so fun to dig through my stash of scraps and play with ideas during the assembly. My sewing space literately looked like my fabric, ribbons, and zipper collections had exploded. It seemed no matter what I auditioned for my first creation, it worked. No chance to make a mistake!!
All the stuffies I have given away have been warmly received and loved. Of course, the un-conventional ones are given the ‘once over’ as if they need to be explained. The owl was more traditional and needed no explanation.
To get you started I am sharing my pattern for Juniper Owl. I included some very basic and brief instructions. If you have not sewn a stuffie before, consider starting with a medium-size non-conforming stuffie using a basic shape (ex. oval) and embellishing it as your creative spirit tugs you. Check out all the creative examples in Pinterest or a Google search. Most importantly, have fun.


Since my last post months and months ago I have devoted a lot of energy and time indulging my curiosity as an attempt to play and be creative. I have challenged my own typical intentions of devoting my time and effort to mastering skills to the idea of NOT mastering something, but intentionally playing around with ideas and skills for the sake of exploration, learning, and experimentation and not necessarily on mastering an particular skill. I tend to want to master everything and not simply experience it. I have tried let go of the desire or goal of mastery and embraced an intention to play. Oh, and in the past I wanted everything I attempted to turn out. That is a handy goal when it is important to produce something, but not so handy with the intention is to play. So, I have tried let go of mastering and producing as my intention.
I have spent time playing with and resisting the mastering of photo editing, junk journalling; paper-folding; watercolor painting; inkjet printing on fabric, crumb quilt piecing; long-arm quilting; new free-motion designs on my domestic sewing machine; designing and sewing stuffies; and doll making. During this time of limited travel and social gathering, plus the current season of a real-life Minnesota cold and snowy winter and less outdoor activities, I have found the past months to be the perfect time to take these side trips.

Another thing for me to consider is that I tend to want to ‘finish’ things. I recognized that some unfinished projects cause me anxiety. Guilt? Pressure? Okay ALL unfinished projects make me uncomfortable. I have a bunch of them. Having them de-motives me to start new projects and certainly to allowing time for playing. I somehow feel responsible to finish projects before starting anything new. To try and neutralize that mind-block, I have begun to look at projects (and kits) that I have stored (some for years!) and ask myself do I really want to finish them. If I do not, I give it away for someone else to finish or toss it. I have taken a photo or two of some of them that I have let go. I have experienced no regrets. I feel lighter and inclined to either finish some of them (didn’t expect that) or feel freer to start new ones or simply play.
I need to remember that often times when creating I will get stuck and I need to work on remembering I will suddenly be inspired and know what I want to do, try, or learn next. Or I will know when to stop. This is very much a part of my creative process and my creative play. When I am stuck I just need to be okay leaving the project or activity. This might mean stepping away for a time. (Well, that feels like ‘unfinished’.) Often my inspiration that comes after exploring other people’s ideas, seeking advice, or skimming through some of the books I have. I also use Pinterest for help. I am trying to practice a relaxed approach to creative play with a lack of urgency that allows me to more enjoy the playing, enhance my creativity, and avoid the feeling that I need to somehow structure or have expectations to my play. I’ve read research that the most creative people have learned to tolerate the discomfort of the internal tension of not having the answer or solution for a longer period of time than others.
Wise words. Thank you, Laura. My practice of creative play also needs to be my own. Measuring it by others’ processes or outcomes is insane because doing that influences my efforts, interferes with my intention, and creates an arbitrary criteria for whether I am successful at creatively playing. Whether I learn anything or make anything needs to be a minor consideration. I need to be present in the moment and feel joy in the playing with ideas. I think that joy should linger.
Do you find time to play with your ideas and skills? How do you make that time? Do you explore interests for the simple purpose of your own amusement and curiosity? Does that energize you? Bring you joy? What have you played with lately? What have you explored that opened a new world to you? How so? I am curious to know.
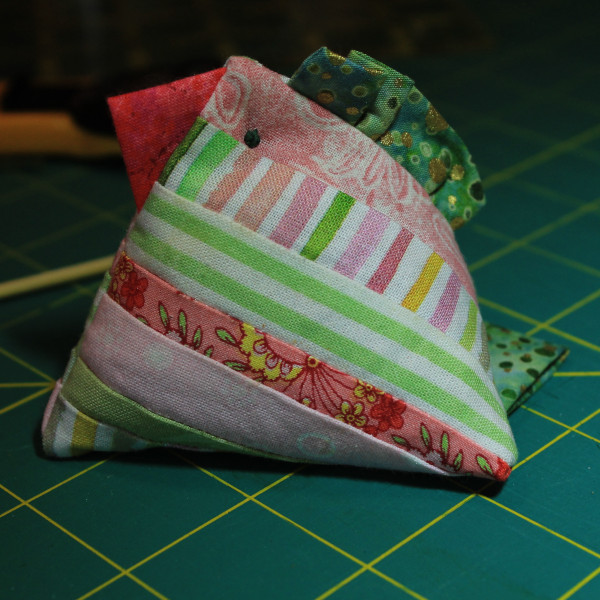
I am crazy about pincushions. I am especially crazy about chicken pincushions. This particular pincushion captured the heart of my four-year old grand-daughter. She hugged it, claimed it, and took it home. I am sure it will be special to her.
I love the cute look of chicken pincushions and I like the shape for easily getting needles and pins in and out of the cushion.
I use finely sifted washed sand from a local beach to fill my pincushions. I find that the fabric and stitching does hold the sand in without any leaks. I’ve used crushed nut shells (makes my pins gummy) and rice (attracts mice). Not only do I wash my sand until all the dirt is removed, I soak the sand in a weak bleach solution for a few minutes to remove any lake/fish smells.
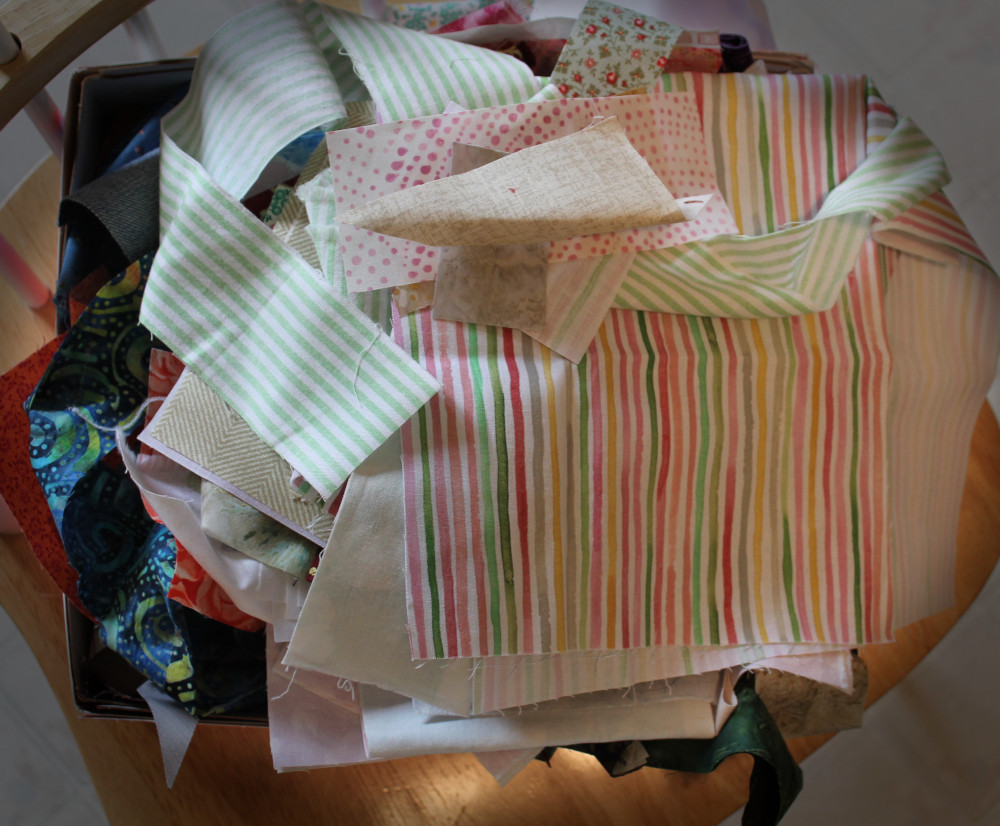
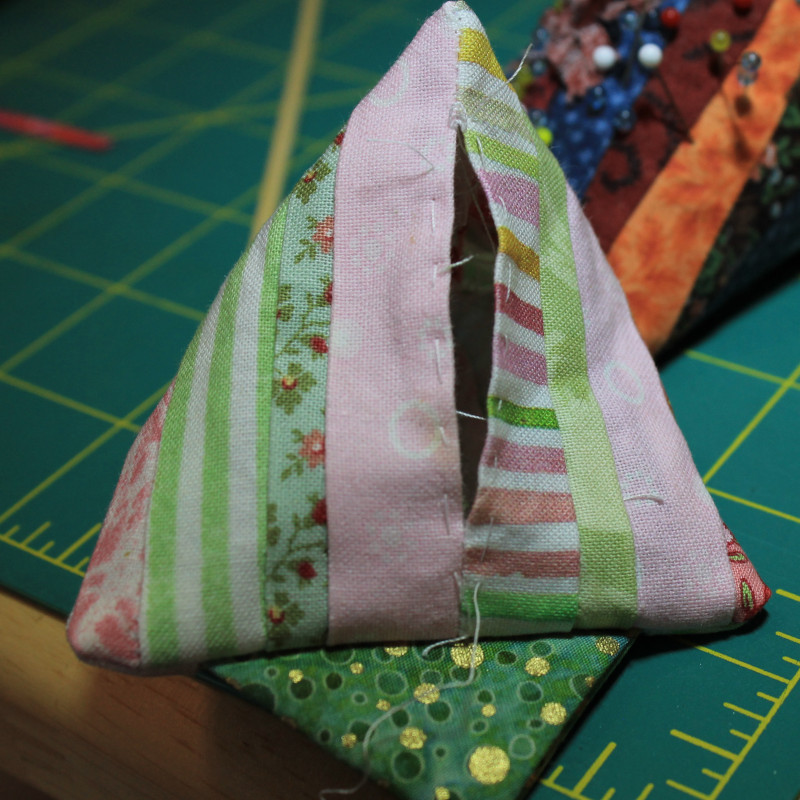
In this post you will find a link to a simple paper-pieced pattern for two three-inch blocks that you can use to make a small striped chicken pincushion. With this project you can use up very small pieces of fabric from your stash. The pattern offers four 3-inch pp blocks to make two pincushions.
HINT: You can use any paper for your paper piecing foundation. I like velum paper that is light weight. It works in my ink jet and laser printers just fine. It is crisp and is easily removed from the blocks. AND best of all it is translucent so you can see your placement of fabric as you add new. This is especially helpful when sewing on irregular shapes (triangles or other angled pieces).
Link to the PDF pattern and directions to make your own chicken pincushion.
Have fun making your own pincushion.

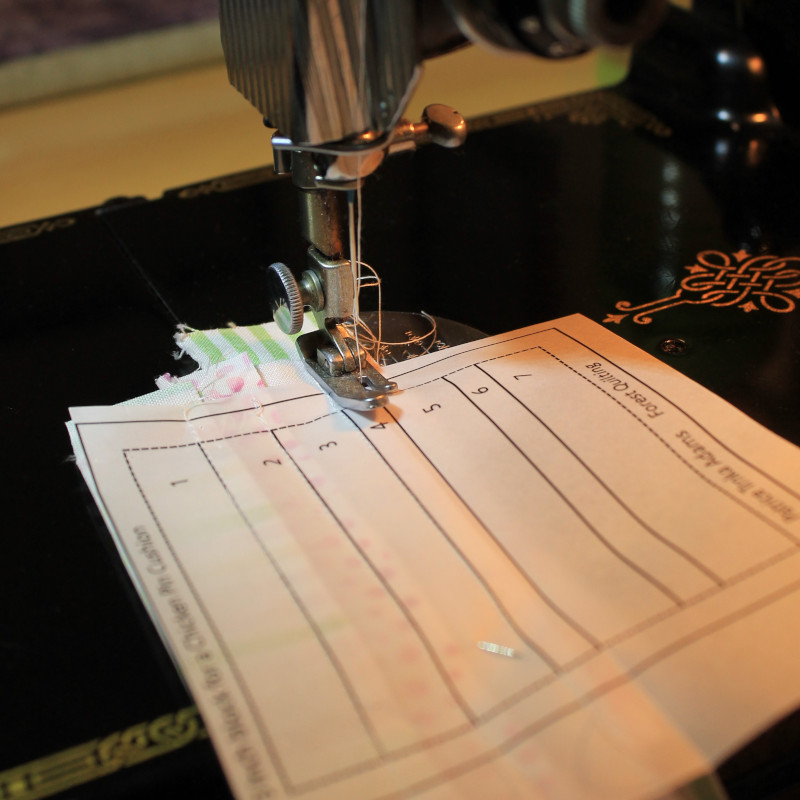
Simple Paper-piecing of two 3-inch blocks.
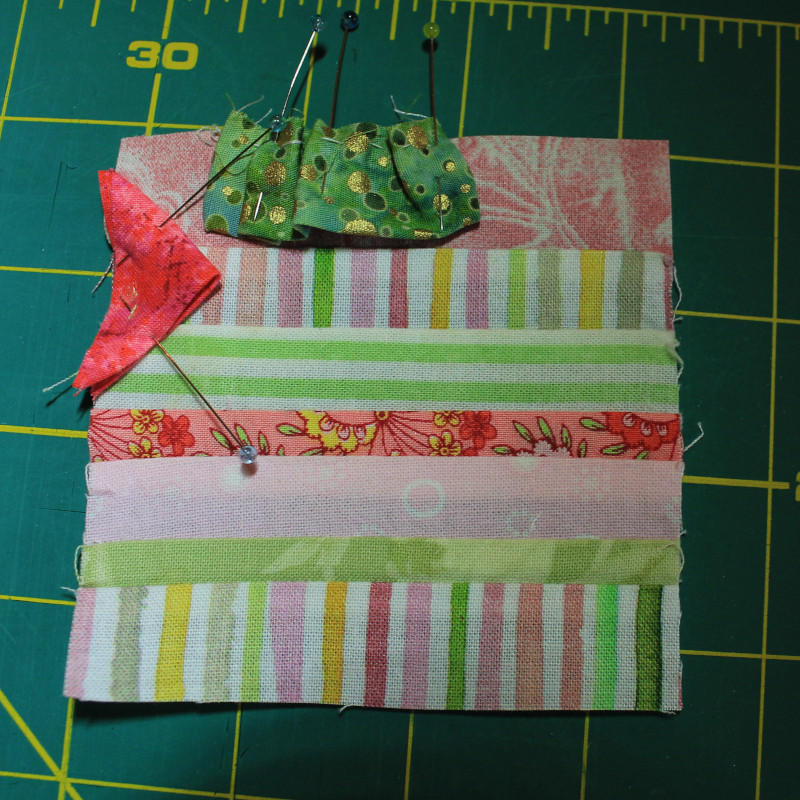
Pinning the beak and head feathers.
Baste the opening where the sand will be added stabilizes the fabric and the opening is easily stitched closed.
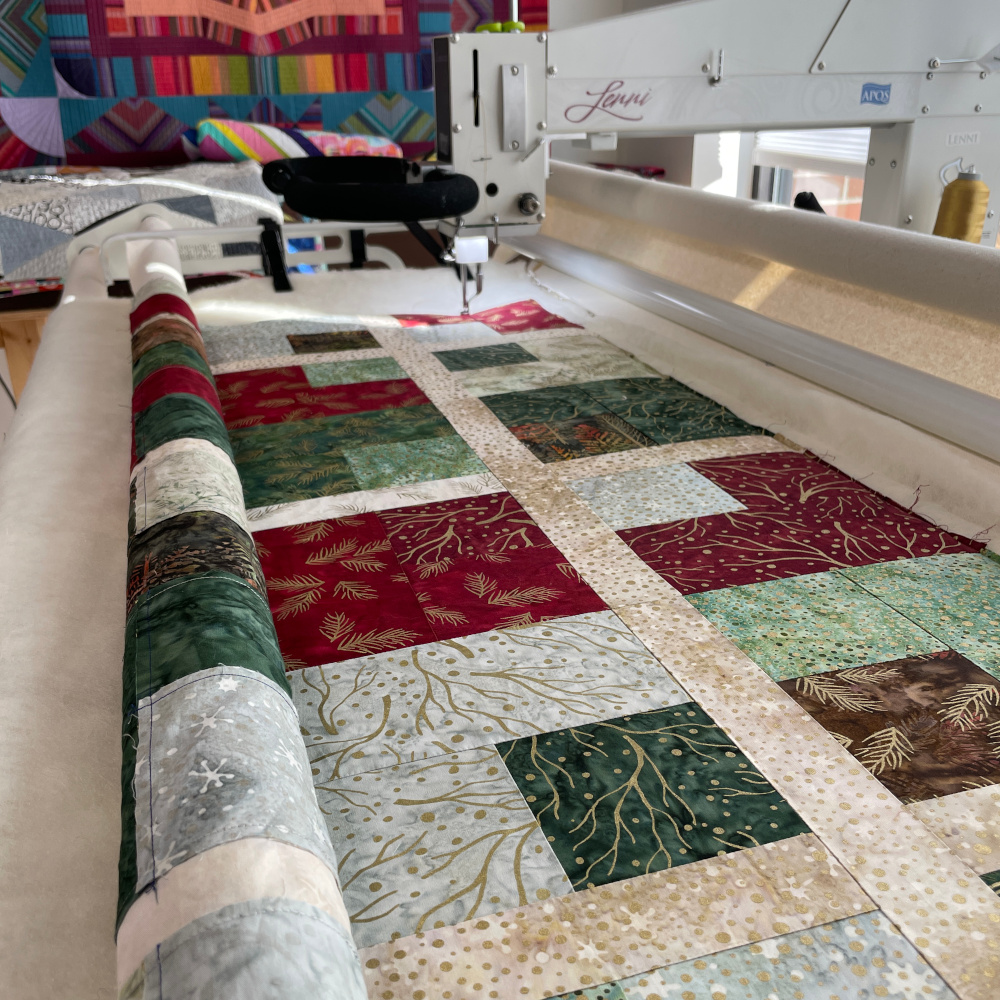
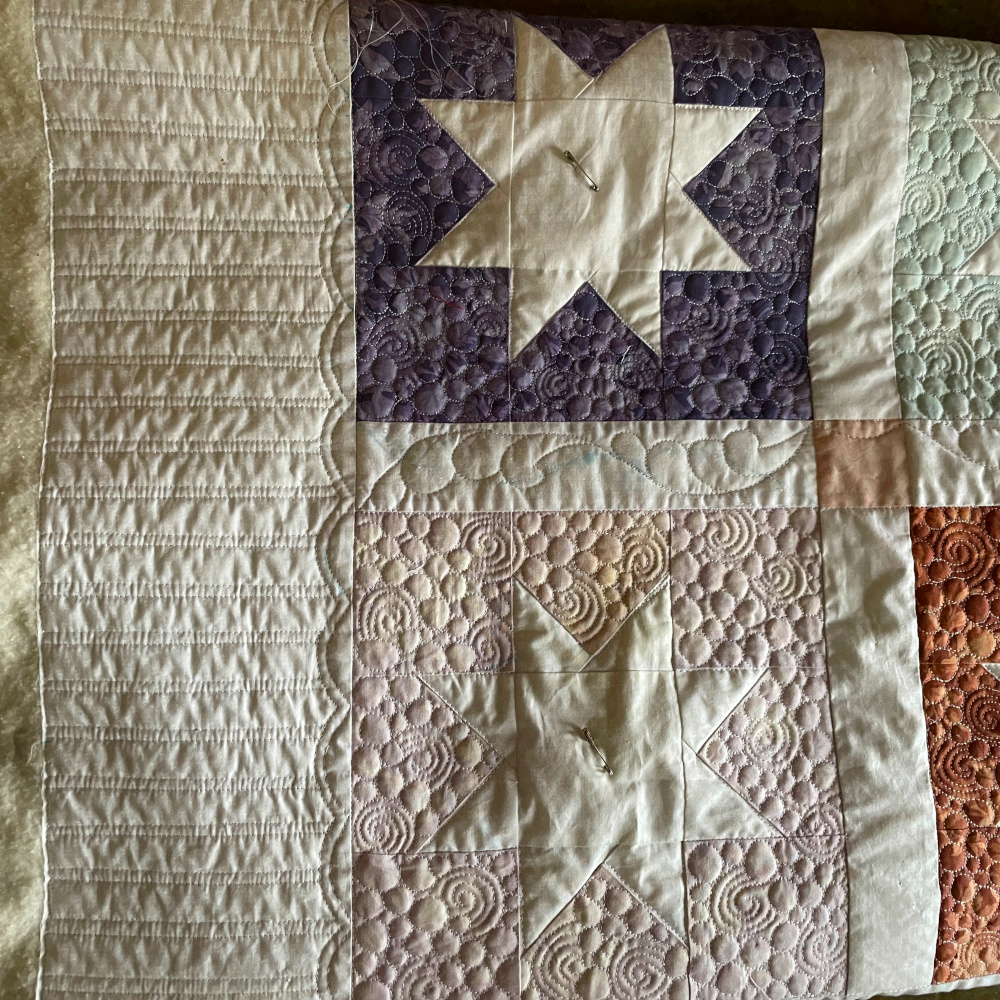
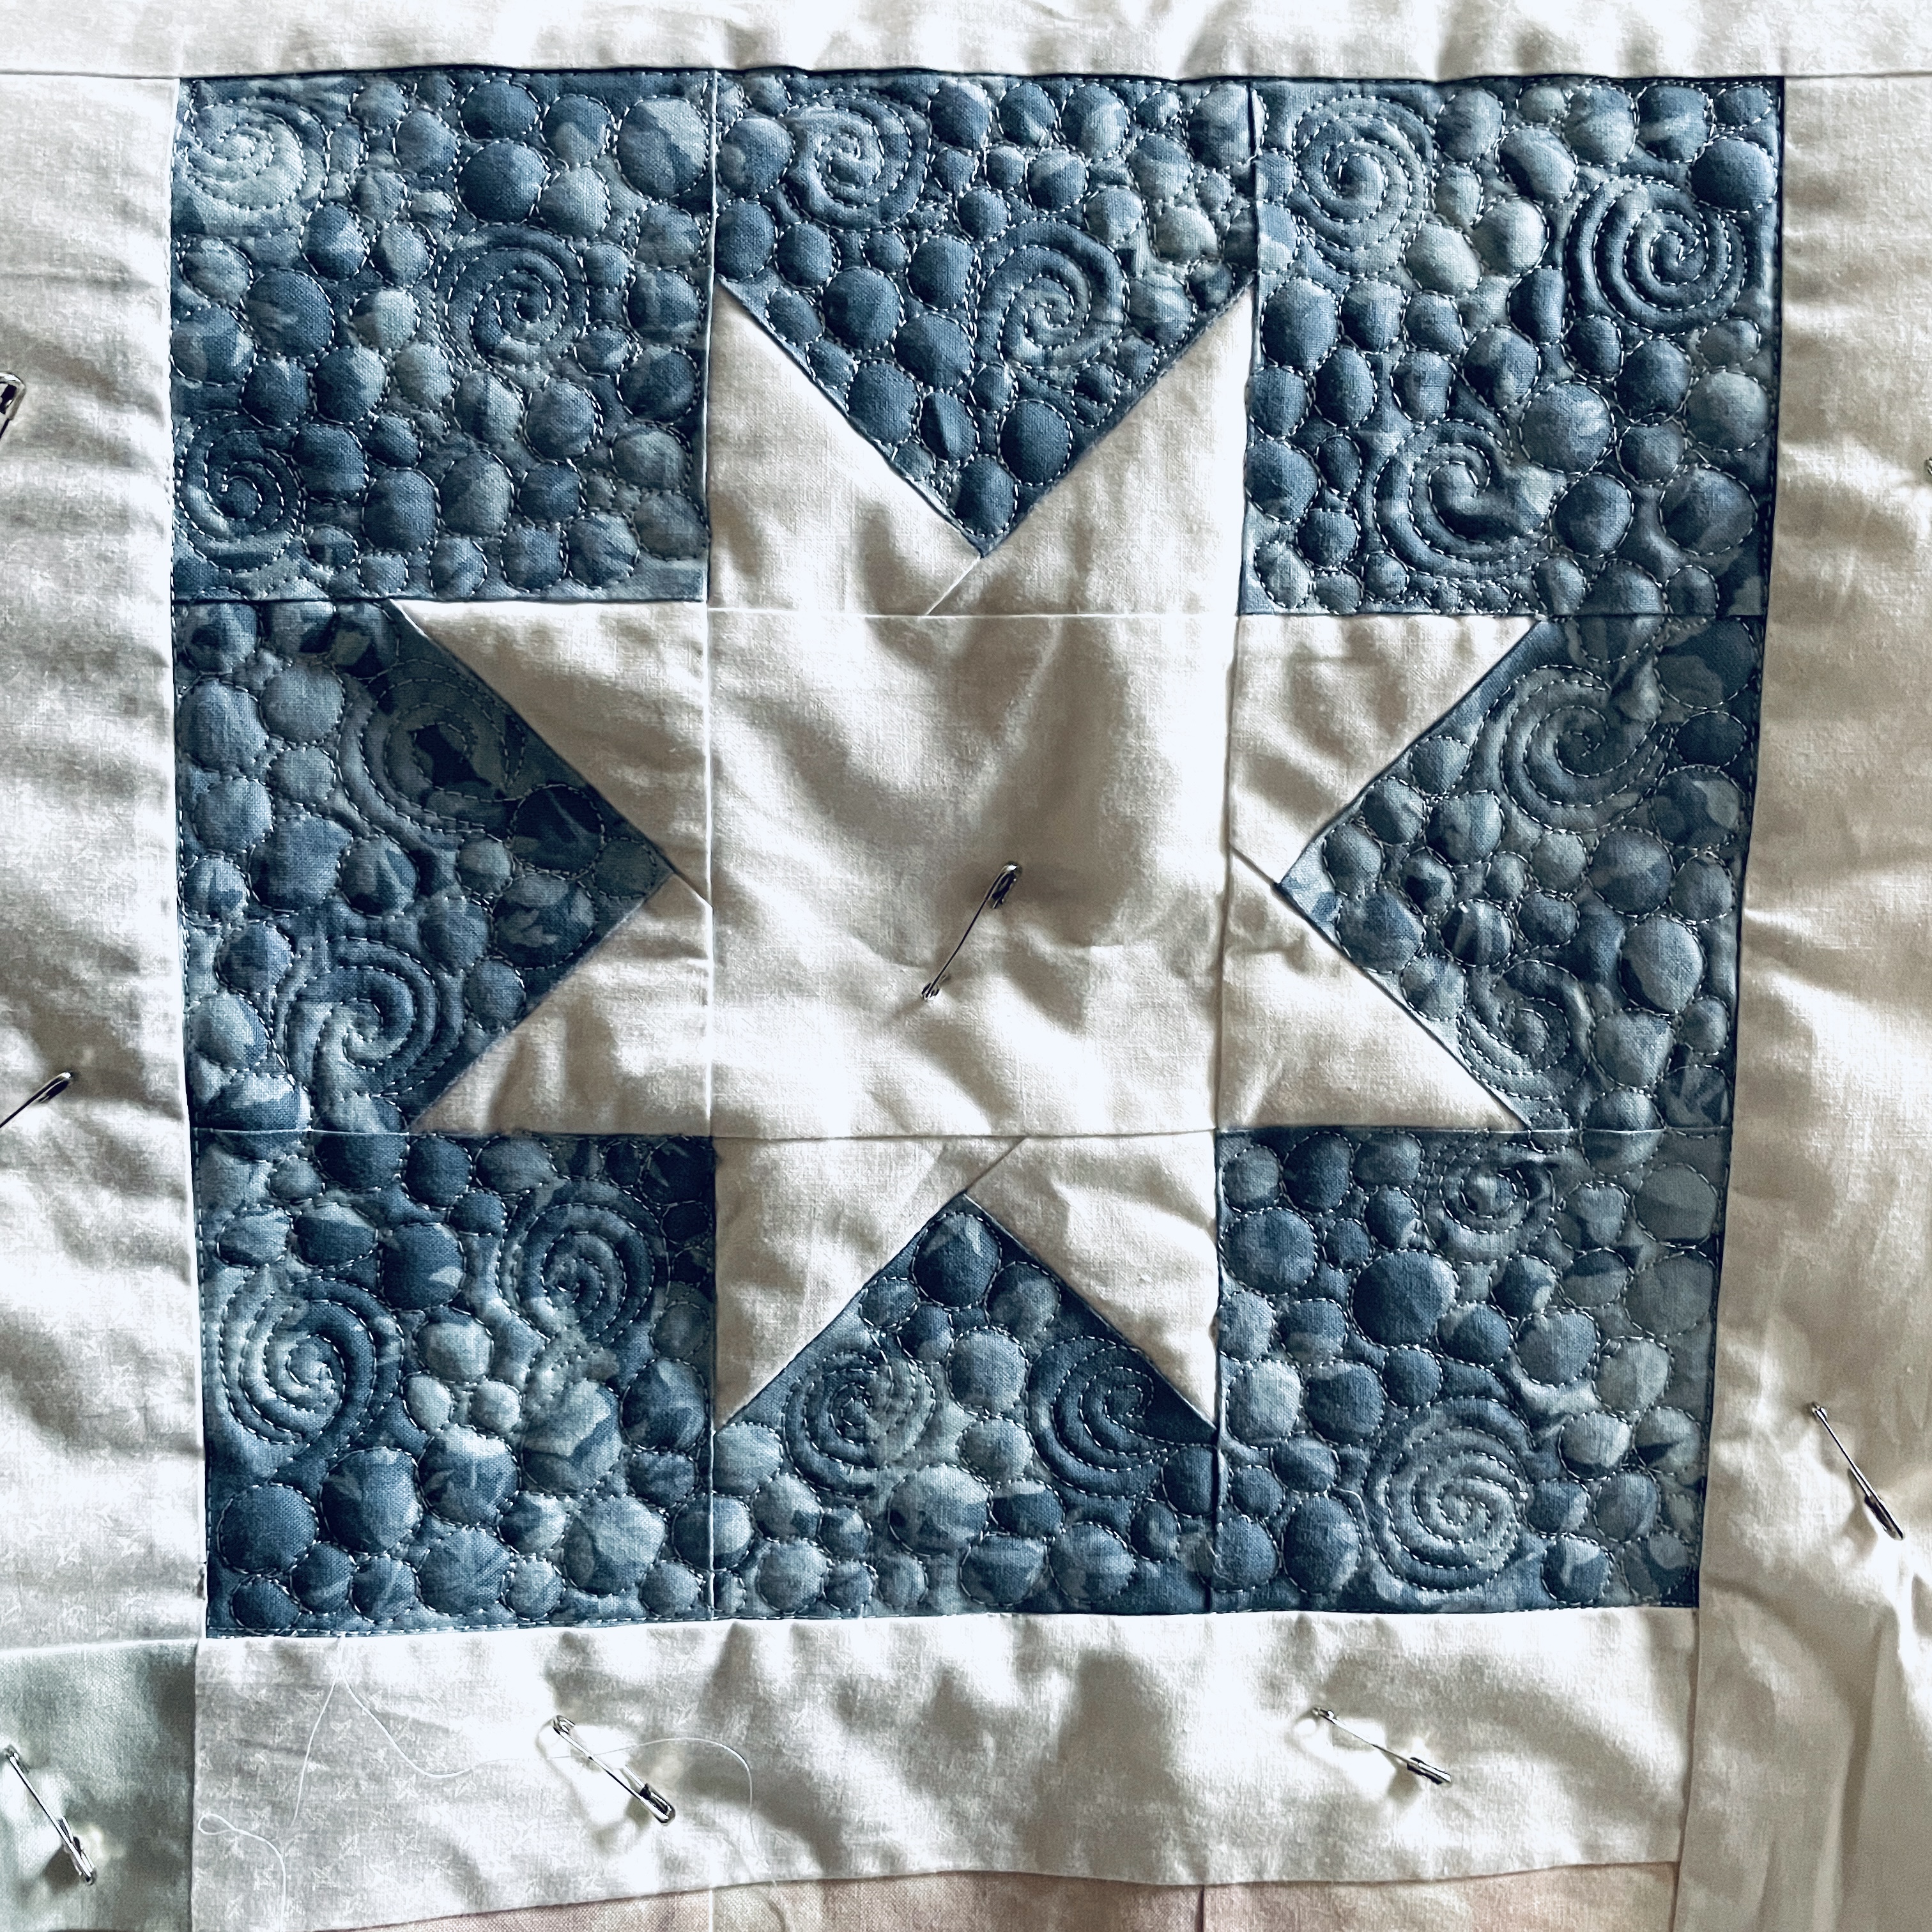
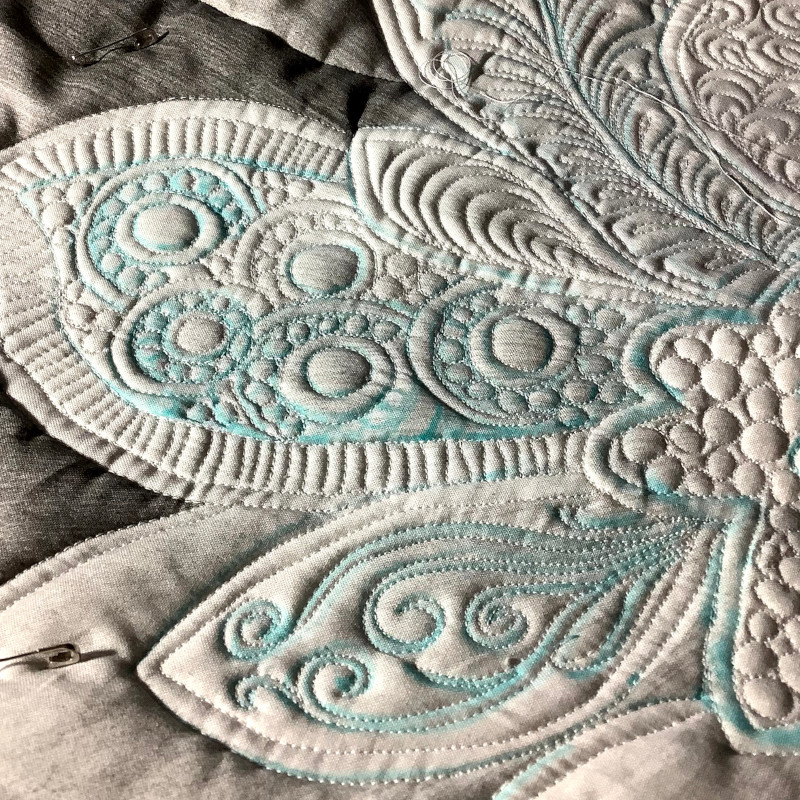
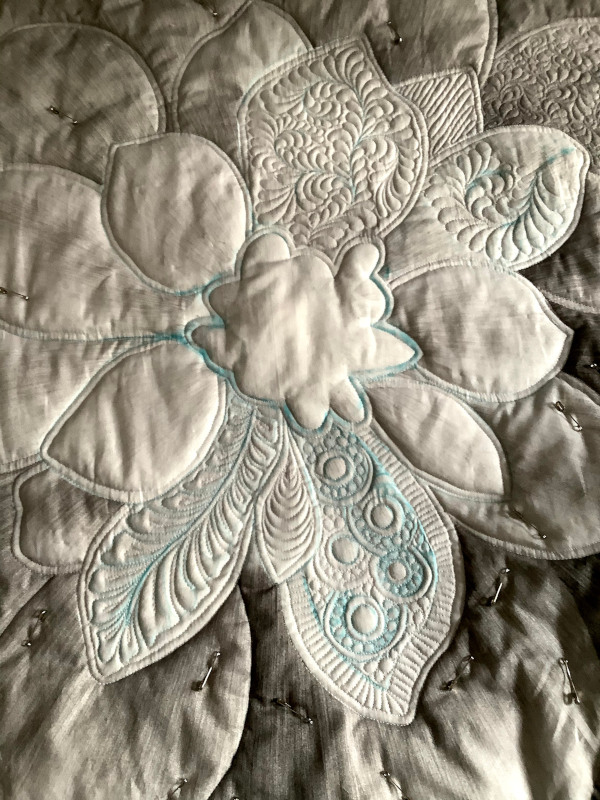
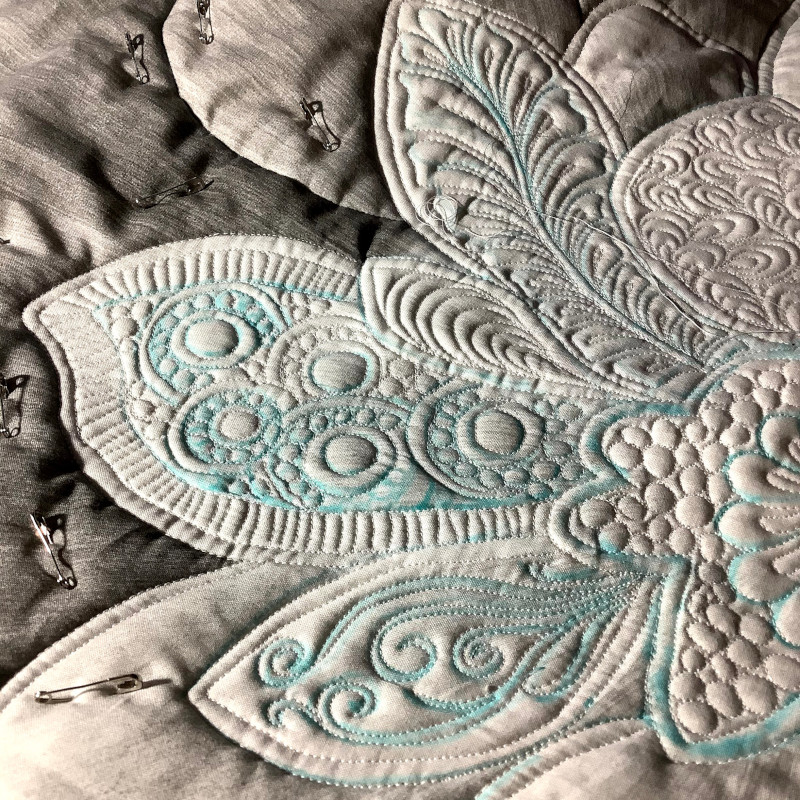
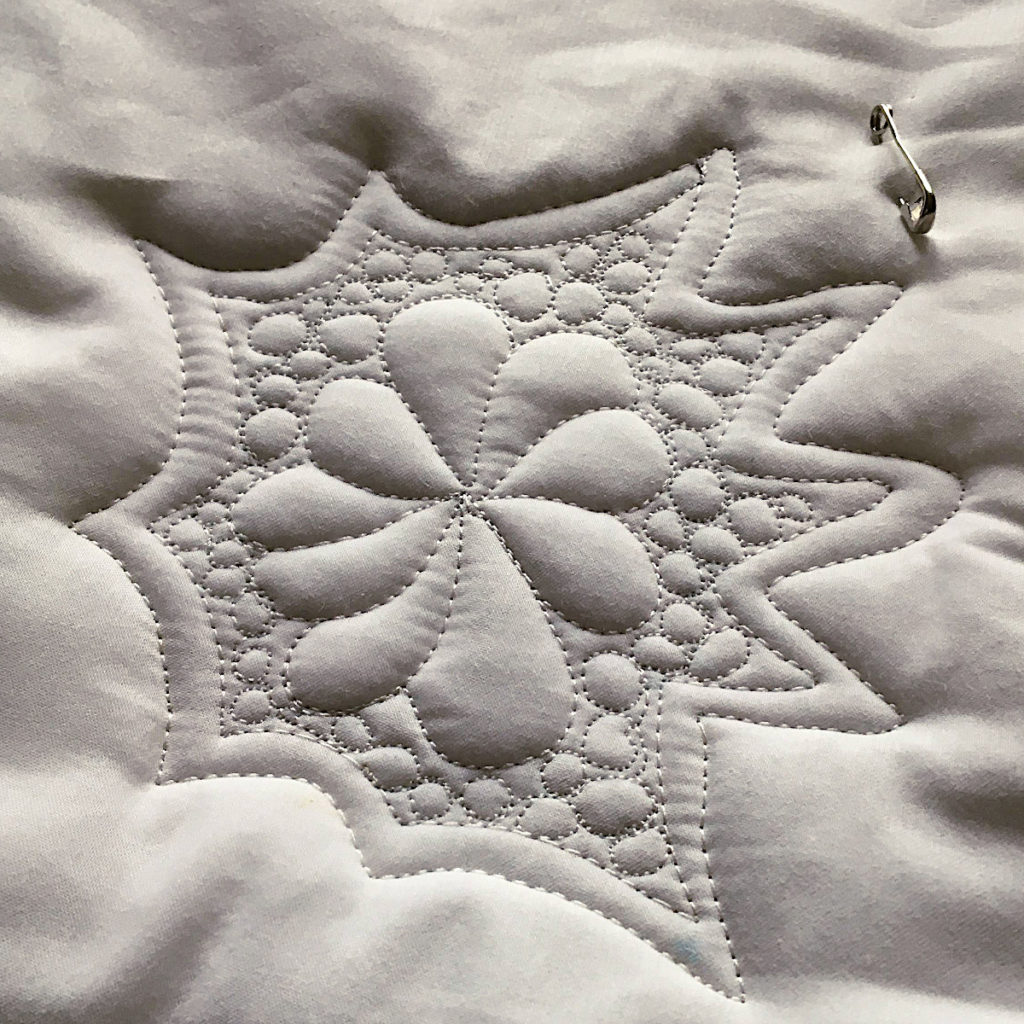
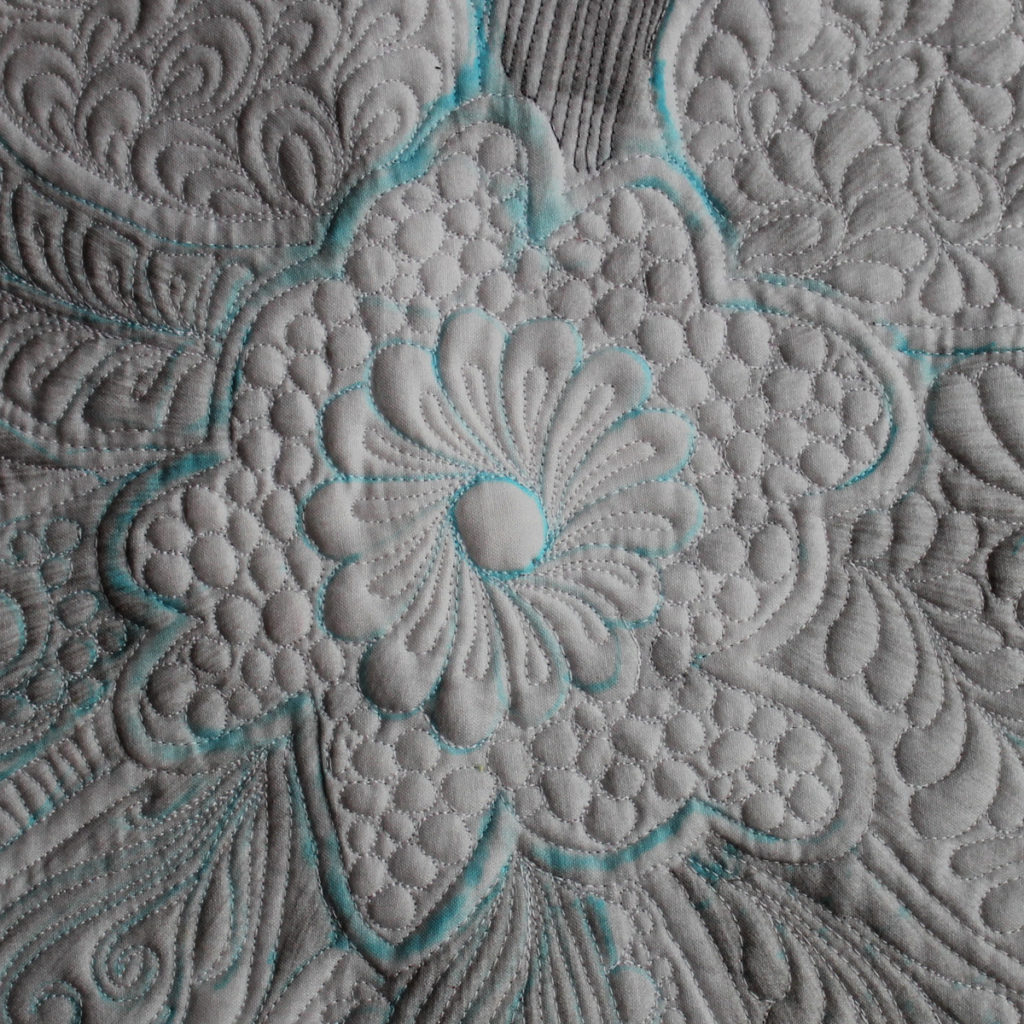
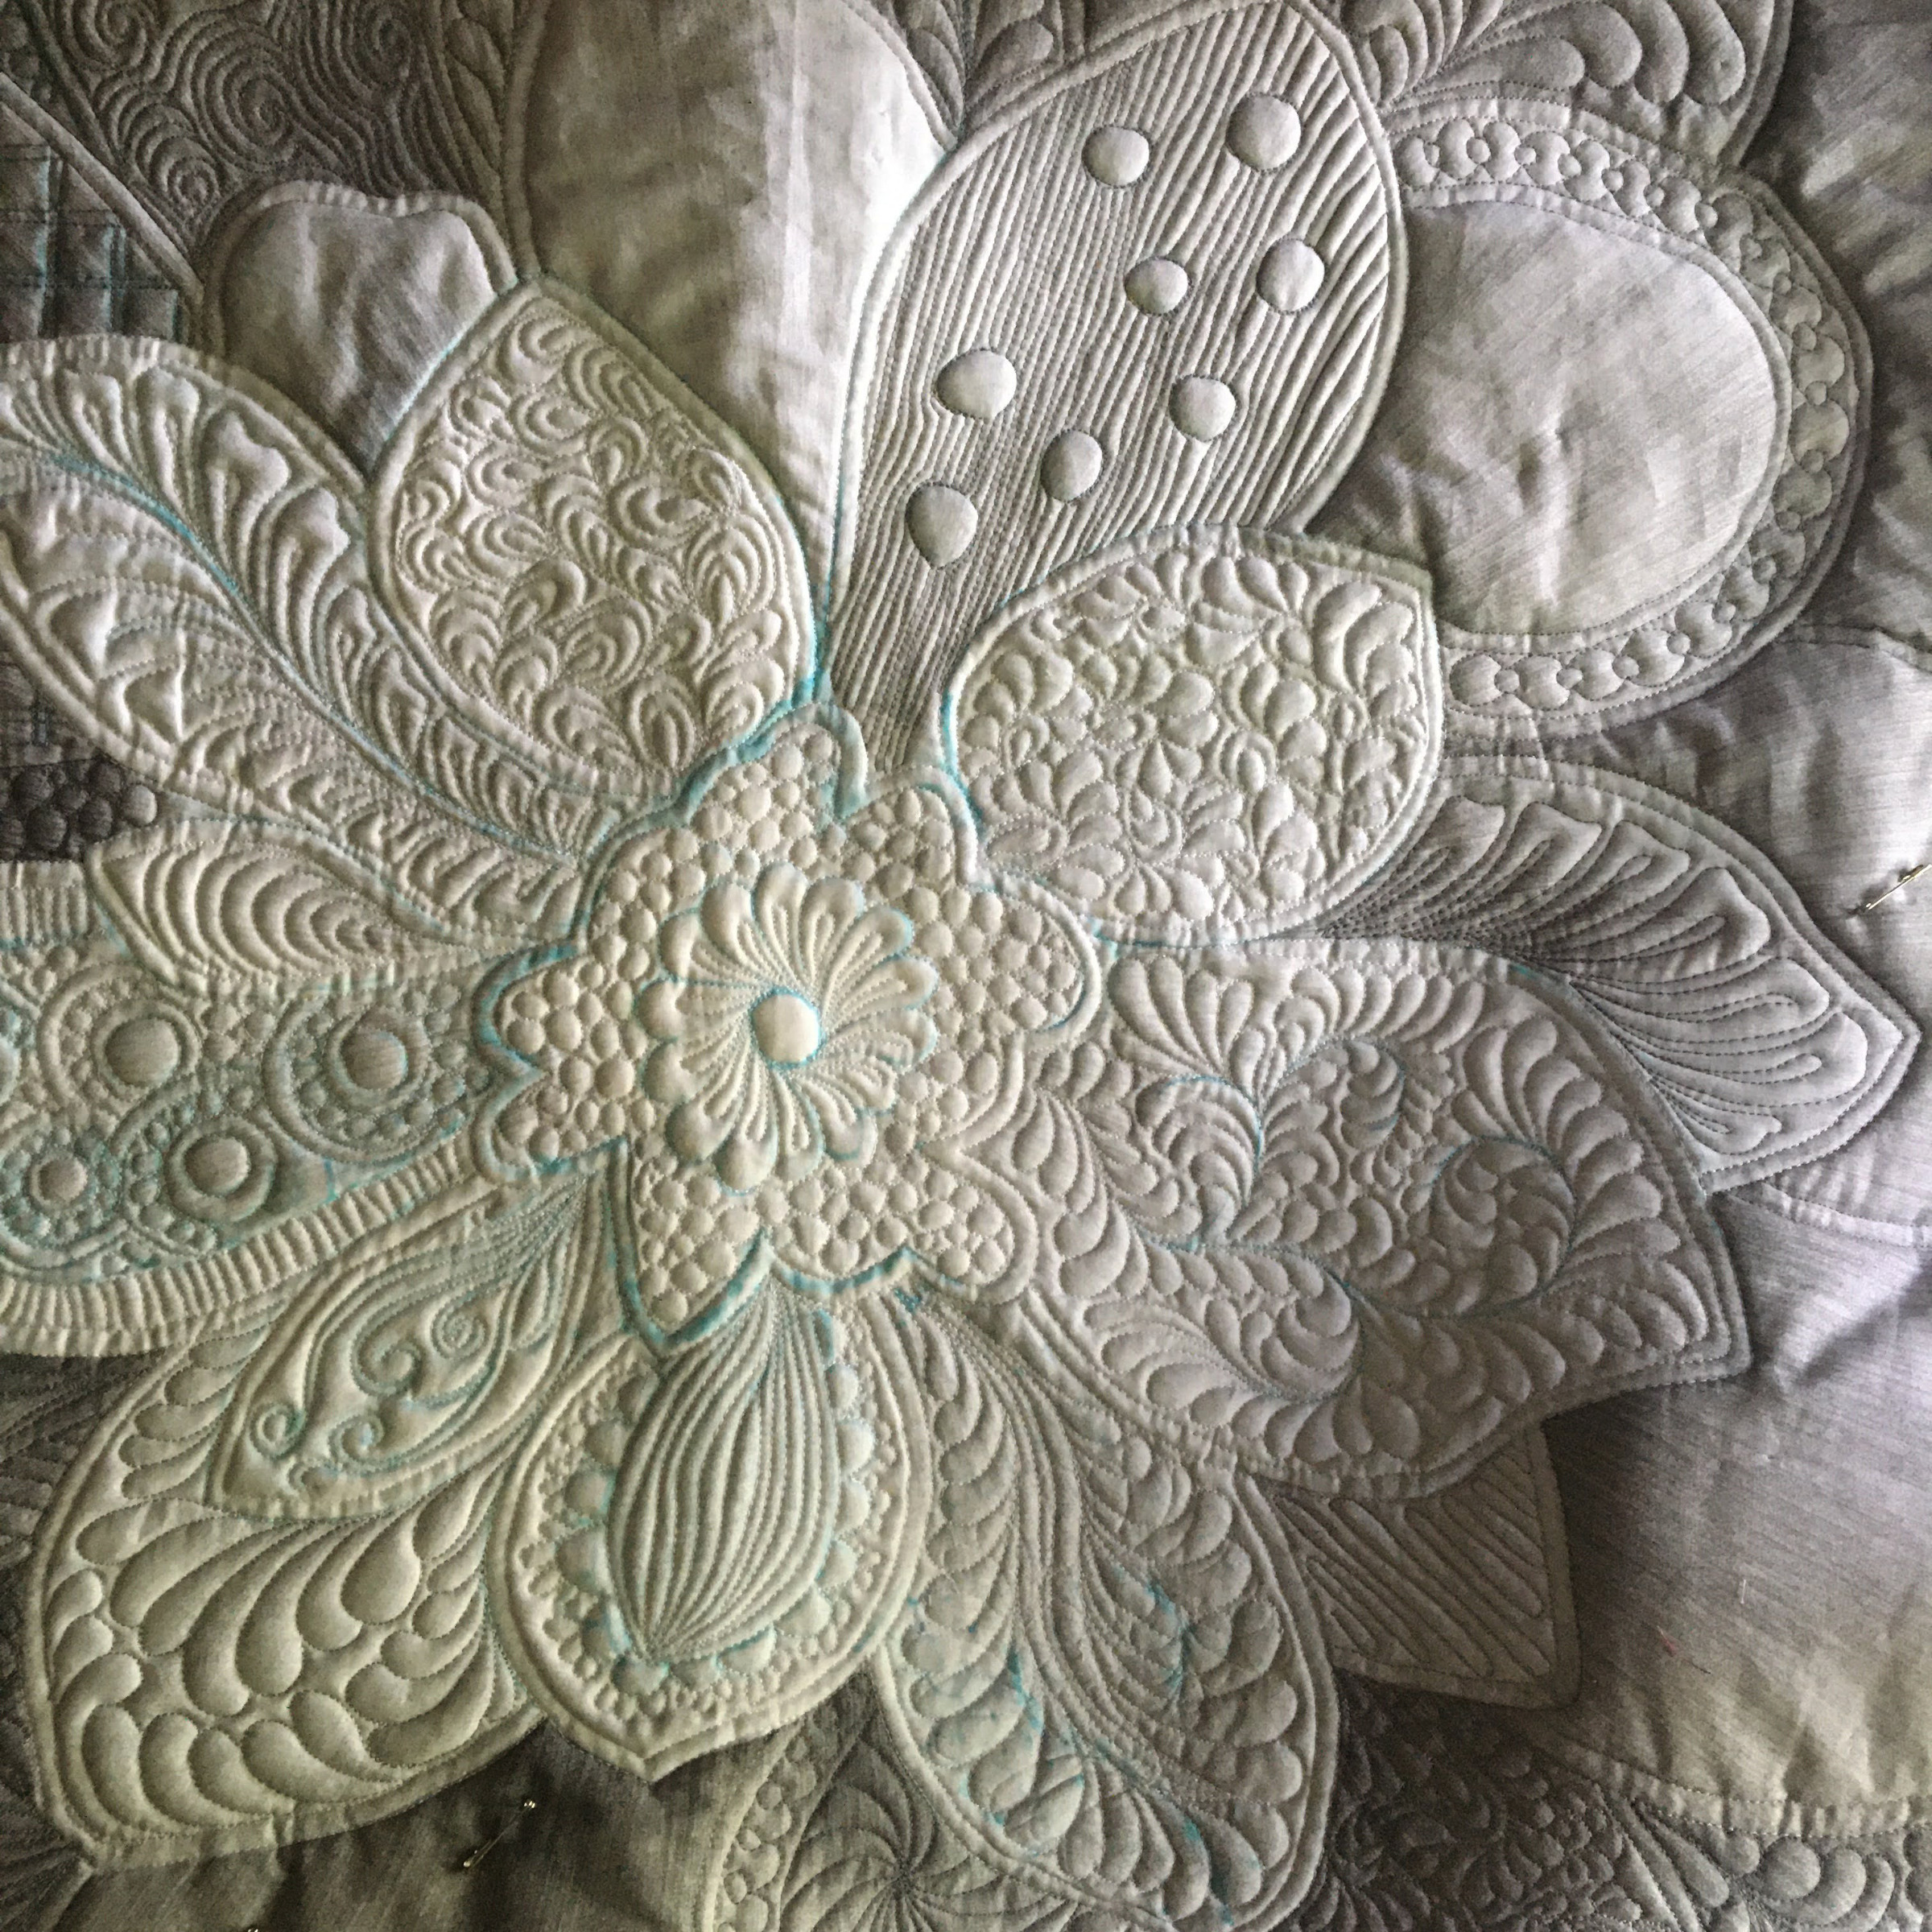
I am working on my Hoffman Spectrum Digital print fabric panel that I received for a gift about four to five years ago. I have been so excited to do this and have so appreciated all the generous quilters who have posted photos of their amazing quilting of this panel. They have also offered information on the process they used and what materials they used.
I requested a black and white panel because I wasn’t sure where I might hang this when it was completed. I am using white thread at the center, a lighter gray, medium/dark gray and black as I work out from the center.


I am only going to say that this past nine months has offered me much time to focus and putz with my fabrics and work on old and new projects. I’ve also focused on other things I enjoy. I have scanned photos, done some woodworking, read books, played around with hydroponics, learned to consistently bake great bread (thanks to all the awesome bread-making youtubers!) and explored sour dough bread making. In 2021 I want to focus on growing my drafting skills and adding some ideas to my website.
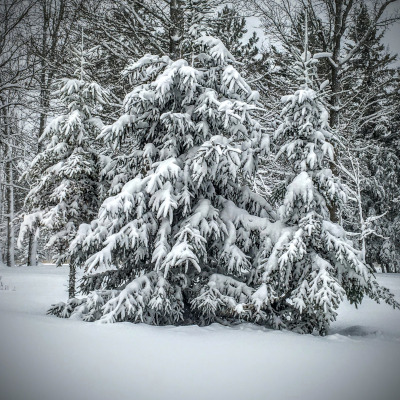
So this week I added a paper-pieced pine tree block. I have countless variations of this tree design and have used them many, many times for pillows, table runners, cloth book covers, bags, cards, potholders, and pincushions. I’ve made this pattern tall, skinny, fat, short, wonky, Nordic, holiday, and contemporary. A pine tree is my favorite outdoor item to work into my quilting and sewing. I love trees. LOVE them. But pine trees are my favorite. Outdoors and indoors.


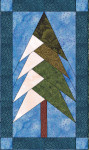
The Spruce Tree block is paper-pieced and offered in two sizes – 4 by 8 inches and 2 x 4 inches. Of course, you can adjust your size percentage on your printer to enlarge or shrink.
Enjoy playing with this tree pattern. Let me know what creative ways you use it. Watch for more pine tree patterns to be added to the site. Also if you meet a friendly tree, give it a hug. Seriously.
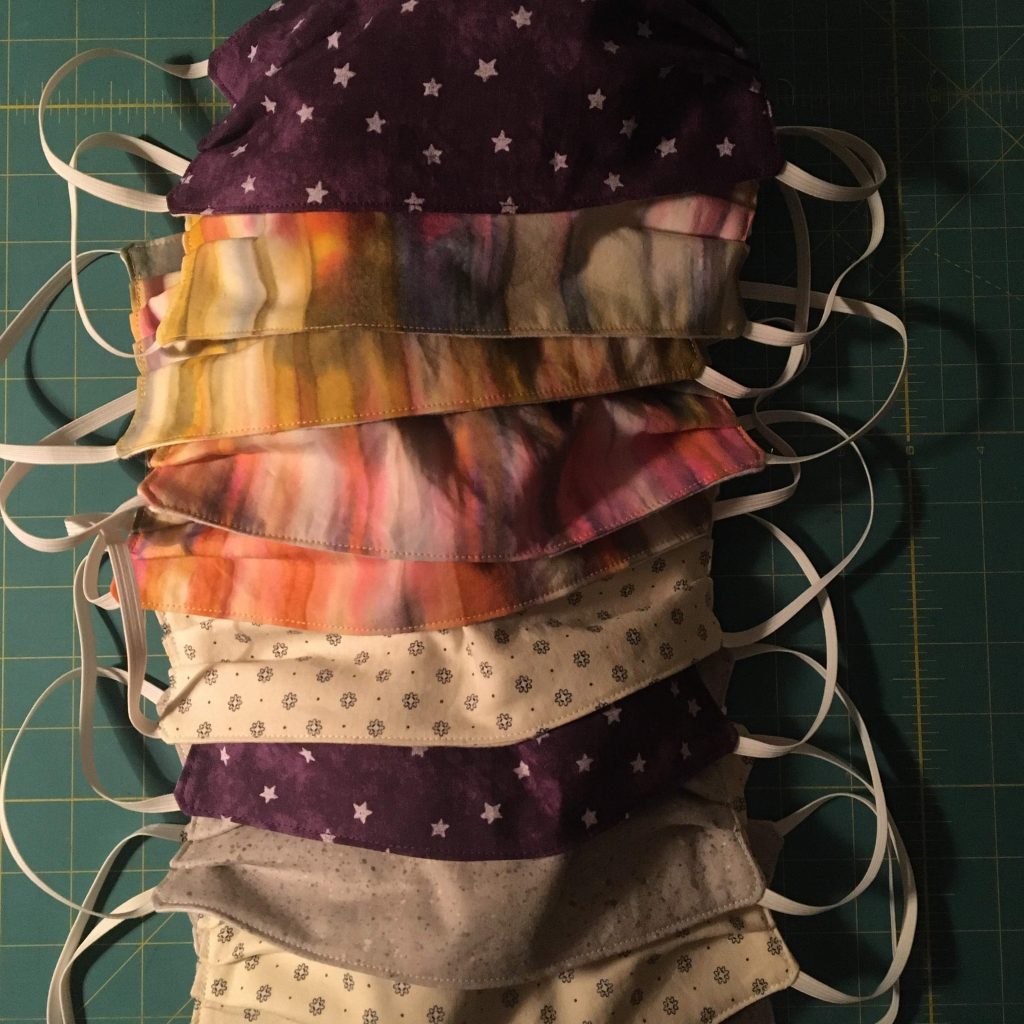
Since the end of March 2020 my quilting has been set aside for sewing masks. At times I crave time working on my quilting and commit to taking a pause from the masks, but then a need or a request arises and I make a pile more of masks. I try to remind myself it is the least I can do to help in this time of craziness. The very least. I am not making 100s of masks… I am no heroic maker of masks. However, it feels good to make a bunch and give them away.
I have tried a few styles and patterns and I thought I would share my favorite patterns and links for the sites I’ve used. I’ve gotten feed back from some about the fit and comfort of the various masks which I will share also.
I started out making the folded and pleated masks until I ran out of my stash of quarter-inch elastic. Then I began making a super comfortable, adjustable mask that used bias tape, which I did not have. However, I found a wonderful, short video on how to make your own without the special tool. I made dozens of these masks and was able to starch them (a lot) and press flat to fit into a business envelop and send one at a time using one first class stamp. Lastly, I found a 3D mask pattern that allows for adjustment and does not take as long to make as the bias tape mask.
Below are the three masks I’ve made with links to each. Following the list I have added more information and links to other sites that gave me ideas or guidance in the construction of each.
The folded or pleated mask was one of the first mask patterns offered about the middle of March this year. Since then there are now hundreds of options, styles, patterns, and sizes to choose from. There are also hundreds of videos available for construction guidance. This mask is comfortable if the straps are the right length, but because they are not adjustable I had some reports that the masks didn’t fit well. Recently I started using cotton t-shirt fabric to make stretch cording for the ear loops and pony beads to make the loops adjustable. I think that could be used on this pattern to ensure a better fit. This mask is not as fitted to the face as well as others masks are with metal over the nose or a more rounded style to cup the chin.
This mask is made with a two pieces of fabric 6 x 9 inches. Two pieces of 6 inch 1/4 inch elastic is used for the loops over the ears. Pleats are sewn onto the sides. This mask takes very little time to cut out and construct. Here is the link to RuralOrganizing with a short, complete video on sewing this mask that was posted the middle of March 2020.
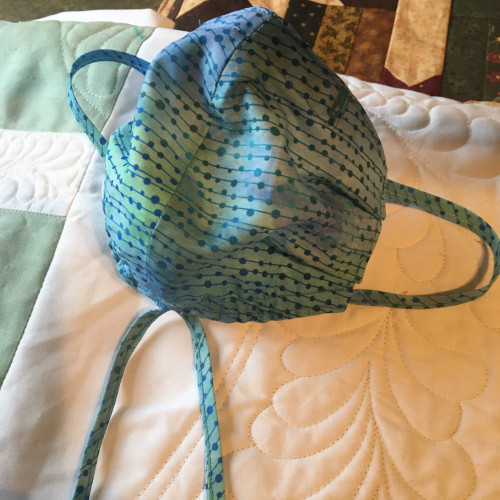
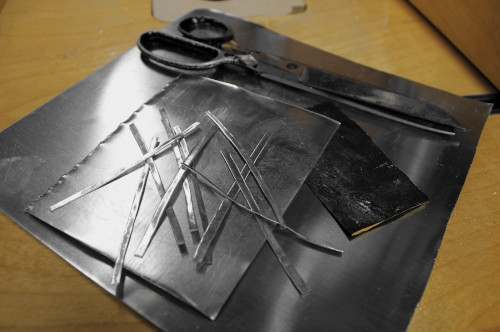
This is the mask pattern that I have made for my family and friends. This mask is great because a pull cord under the chin, which is made of bias tape, allows the wearer to adjust the size. The mask also rests away from the face so it doesn’t feel close and hot. This mask also includes a wire or piece of metal over the nose to avoid gaps. My husband gave me a thin sheet of aluminum metal that I cut into narrow strips with an old scissors. I’ve read that some use the metal strips from a bag of coffee. Others use wire that they loop at the ends to prevent the wire from protruding out of the mask. This mask has a design that cups around the chin to offer a more fitted feel. I’ve had many say this is the most comfortable mask. However, this mask takes more advanced sewing skills and a bit more time to make.
I like the idea of not having to use elastic, which I understand is still hard to find. I never use bias tape, so I did not have any on hand. I also do not own the tool to make bias tape. However, I found a great Youtube video for making bias tape without a bias tape device. It was fun (but more time) to use the same fabric for the bias tape and the mask. I found making sure the fabric was medium to heavily starched made the process of making the bias tape so much easier.
Link to a PDF pattern and tutorial from Allina Health for a Pull-Cord-Under-the-Chin face mask.
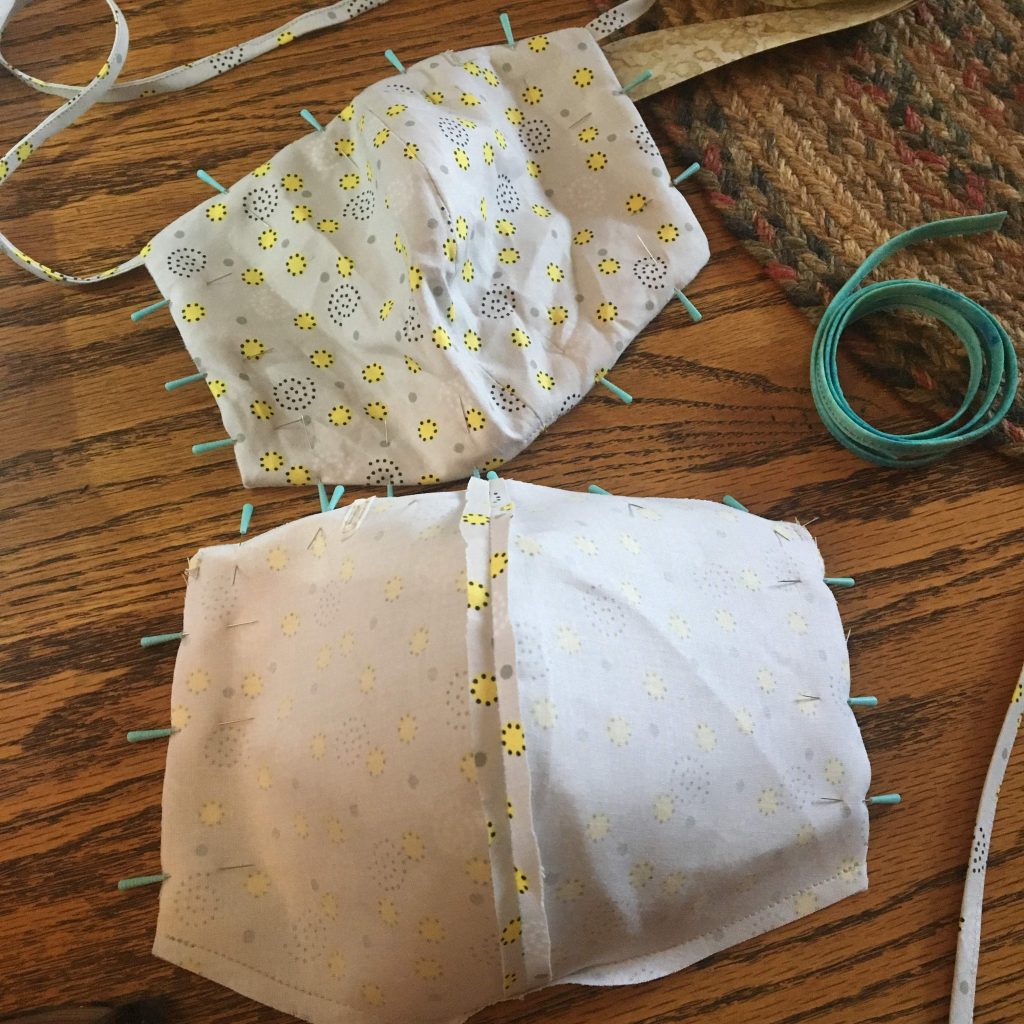
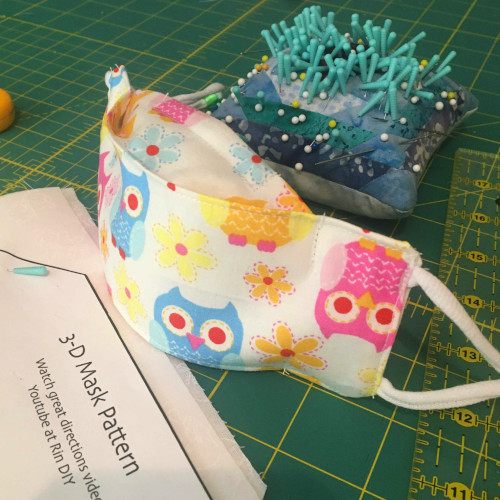
Recently I have discovered the 3D Mask style. I find this particular 3D mask to be roomy, comfortable, adjustable, and quicker to construct. I love the children sizes. I have to say the small child mask is adorable. I’ve made this style of mask for a medical clinic where masks for all is required, even on the kiddos. This also had a bendable piece of metal above the nose to tightly secure the mask against the face. Here is the link to the video I watched to make this style of mask. I then drafted the pattern into the various sizes (links below). I like that I can use my rotary cutter to cut out the mask pieces.
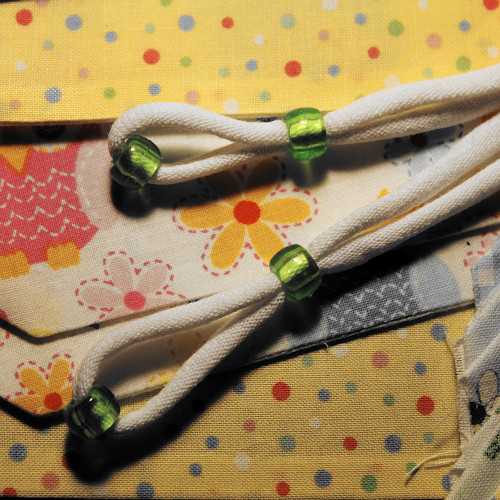
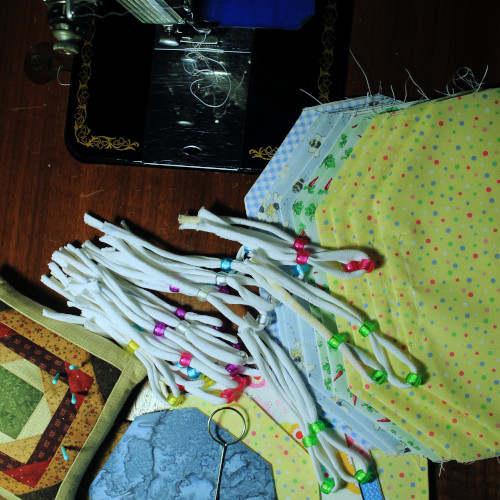
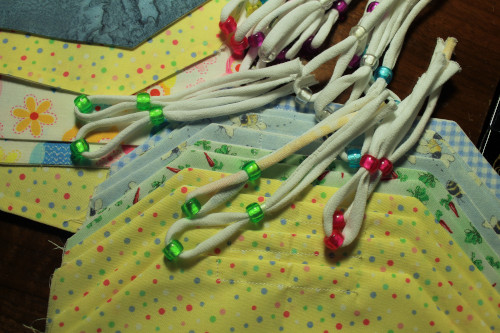
I’ve discovered how awesome t-shirt fabric works for the loops over the ears. It’s soft and sturdy enough with a slight amount of stretch. I use pony beads to allow the loops to be adjusted. Both the t-shirt fabric (100% cotton) and pony beads are readily available and inexpensive. Here is a link to a short video on making stretch cording or t-shirt yarn with a cotton t-shirt. I used 3/4 inch strips of t-shirt to make my cord. Here is a link to using elastic with pony beads rather than t-shirt fabric stretch cording.
I worked on this design for over a year. Then worked on the piecing for a year…and then because I loved the quilt so much I had to take a lengthy pause to really make sure the quilting I added would be perfect. Well, it’s not perfect, but I do love how it turned out. I hang this quilt in our family room all year! I just love it.
I am happy to share this pattern with you. Like the rest of my free patterns I have only sparse directions. My intention is to share the idea with some direction and hope that you are able to take if from there. The pattern I have posted includes a seven, five, and three-inch block for paper-piecing. I hope you find something fun to do with the pattern.
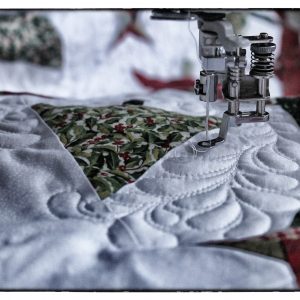
I have included a couple of photos of the layering of my quilt using Harriet Hargrave’s techniques for layering and pinning, which has never failed me. Even when I piece the backing, which I had to do with this quilt, her method allows me to know what is going on with the backing to place the piecing where I want it in relationship to the front. If you have not explored her books, I highly recommend a that you do. She has been a leader in domestic machine quilting. I owe so much of my ability to free-motion quilt to reading and studying her books. I ALMOST got to attend a week-long retreat years ago, but the retreat location changed and I was unable to attend. I have two editions of her comprehensive Heirloom Machine Quilting books and I have all the books in her amazing Quilters Academy series. She has deep, useful, practical information packed into her books. In later posts, I will mention the many other domestic quilters who have shared their expertise and inspired me.
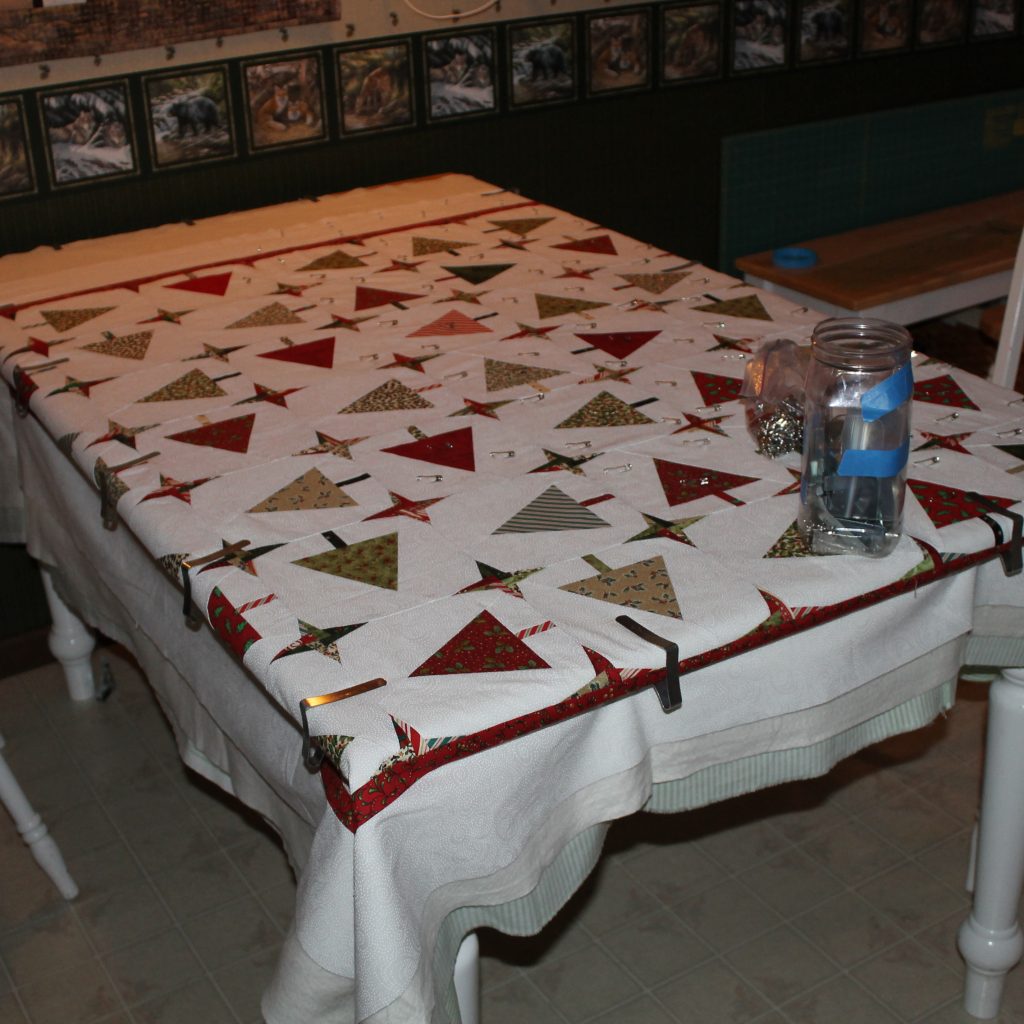
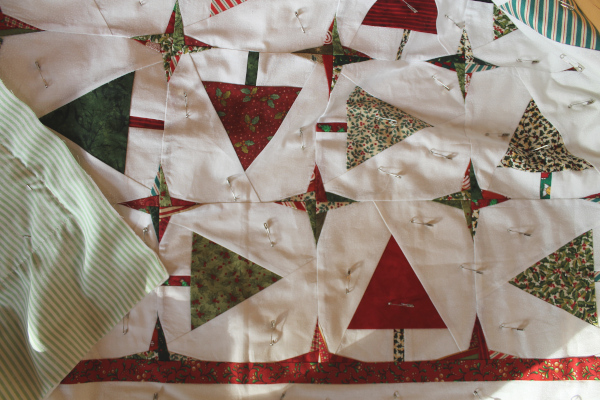
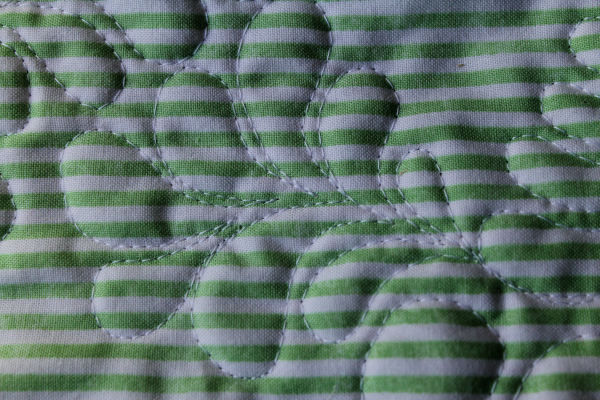
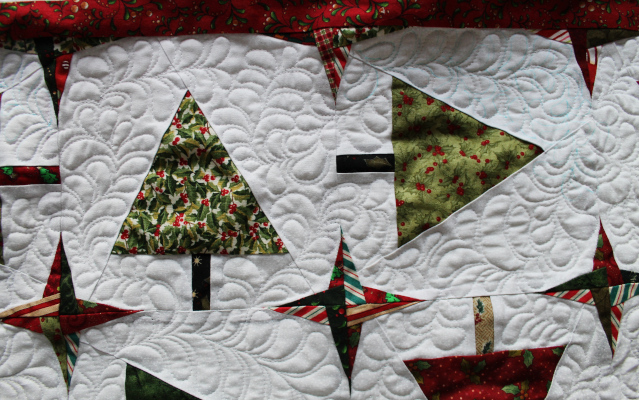
I love Christmas fabrics and everything made with them. This quilt allowed me to use many different holiday fabrics from my stash for the trees and the corners. Nearly everything I free-motion quilt includes feathers. I am trying to expand my skill set and use other quilting designs. I love to make free-motion feathers.
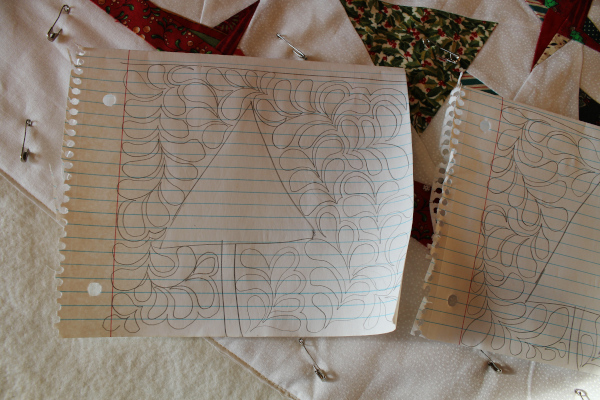
I did spend a lot of time trying out various ideas for the quilting. For me this decision is the most difficult step in completing a quilt, unless I designed the quilt with a specific quilting plan or feature in mind. Here you can see a draft design idea for the quilting that I finally liked. Yes, I went with feathers…..again.
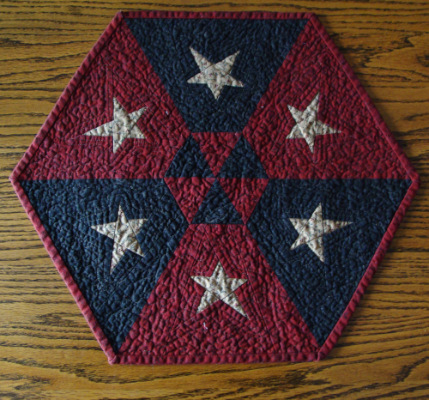
Finally, after years of not adding anything new I added a table topper pattern that I made a few years ago but did not publish. It feels good to refresh my skills with my drawing program and get the PDF ready to share. It seems right now I have plenty of time to work on adding some things to my site.
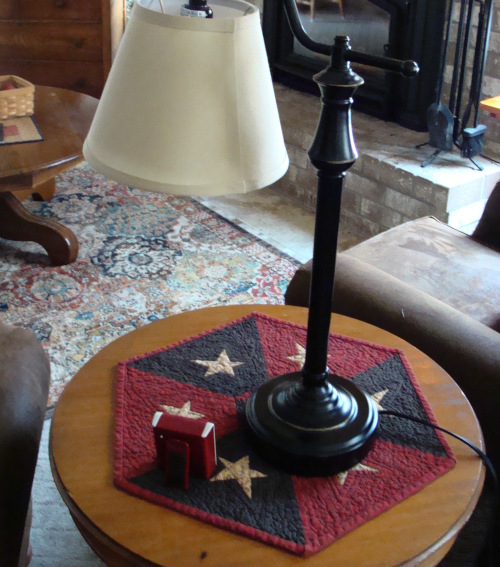
The project is Country Star Table Topper, which is a hexagon-shaped paper-pieced intermediate project.
I hope everyone reading this is well and safe. For me, I have discovered how technology can be used effectively to avoid feeling isolated. Facetime with the grandkiddos is beyond wonderful. Virtual Happy Hour with friends is the best. This week video Messenger conference calling replaced an in-person lunch with a group of friends. Text messages – individual and group – keep me feeling connected. And of course, phone calling is also an option and no longer involves ‘long distance’ charges. I hope you all have the resources to have means of staying connected with others. I also hope you have meaningful, enjoyable activities you can do to pass time. It is so important at this time. I’ve received many humorous videos and quotes, plus deeply thoughtful texts that reaffirm how resilient we are and how we have not lost our sense human compassion and hope and sense of humor. Stay well!
I do have to pause and feel so blessed to have people in my life that share this joy of fabric and sewing. They are talented and stretch my ideas and skills. All have unique ideas for colors and styles, which sparks my creativity. I have a friend who takes panels and incorporates them in to stunning wall hangings or quilts. I have another who is fearless as she does maintenance and total restoration work on her Featherweight sewing machines. Another pulled me in the direction of paper-piecing, which has been life-changing. Another frequently shows us something she ‘invented’ with fabric. Another combines colors in ways that really rock. Another does work with wool that has caused me to acquire nearly a tub (Rubbermaid tub) of wool fabric.
Along with how impressed I am with their sewing, I am honored to be able to sit for an hour or a day…or a four-day retreat and sew, un-sew, create, and share life stories. They keep me grounded. As we each hit the high notes and the low notes in our life we sing together, and I can’t even sing. Not sure how I got into this group. But I am staying.
My wish for each of you, is that you have one or more folks you can sew with, create with, shop with, sing with, hike with, kayak with, travel with, sit with, bake with, or anything else. It’s such a joy. It’s such a blessing.
PS. I got an email this week from Sue in Ames, Iowa, who with her sister, sew mittens for charity. So very much using their powers for good. See a video featuring their efforts at Channel KCCI 8 TV in Des Moines.